This step-by-step guide will show you how to set up Google Postmaster Tools and start getting valuable information about your mailing reputation, authentication, spam complaints, and more in 5-10 minutes, tops.
Create Account
First, go to https://postmaster.google.com or https://gmail.com/postmaster/
(You’ll need a Google/Gmail account to create a Google Postmaster Tool account)
Add Domain
Then, click the big red circle in the bottom right.
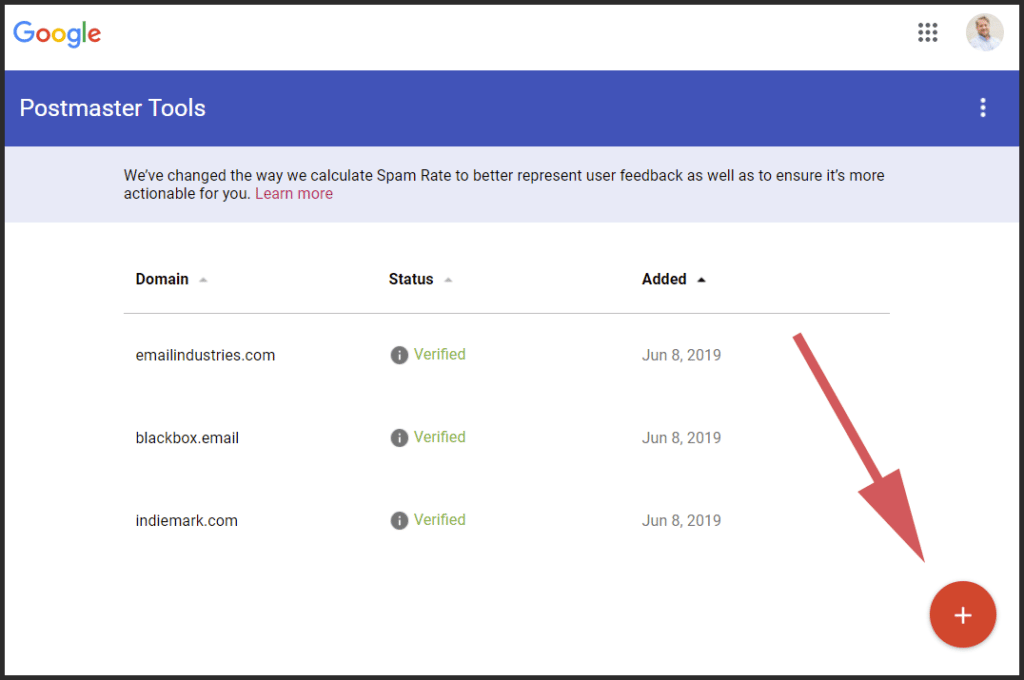
(If you have multiple Google accounts, make sure you’re logged in with the account you want to add the domain to. You can verify this by clicking on your avatar in the upper-righthand corner.)
Lastly, enter your domain name and click next.
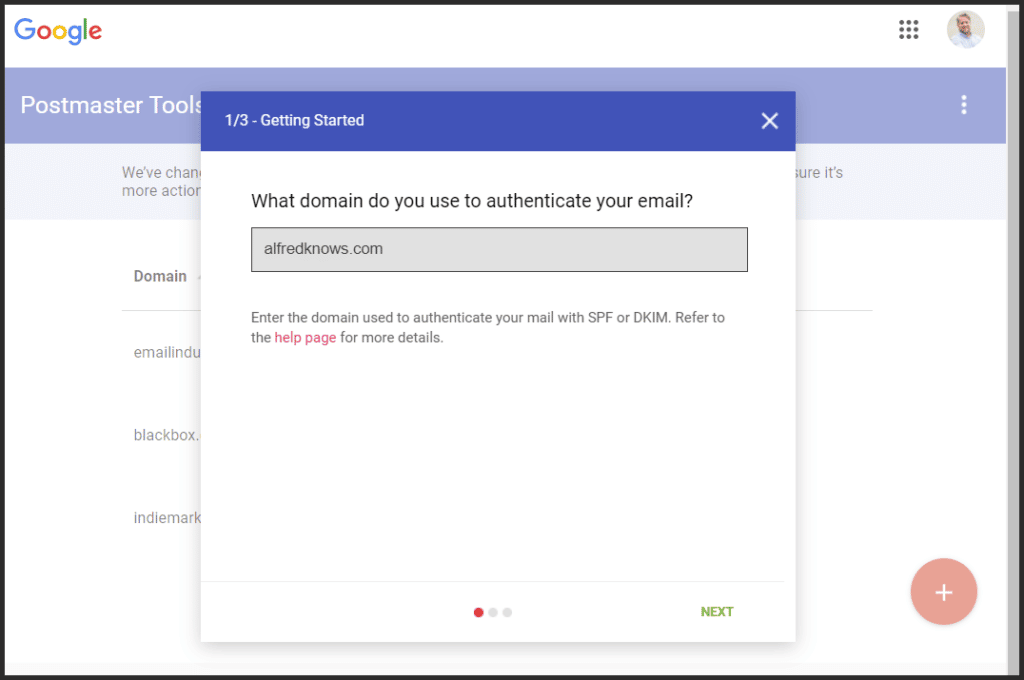
If you’re using subdomains to send email (ex: a.alfredknows.com or b.alfredknows.com), we recommend simply adding your root domain (alfredknows.com) as that gives you the access to the root domain and all subdomains.
Copy TXT Record
If Google hasn’t already verified your domain (which you might already have done in Google Search Console), you’ll be asked to add a TXT record to your DNS for the domain and verify ownership.
First, copy the TXT record (ex: google-site-verification=B7W8gMj232) then save it to your local computer (you may need it later).

Add TXT to DNS
This is easier than it sounds, but know that you have two options for adding a TEXT record to your DNS. Here’s how to do both.
Ask for Help
Send the exact text string to whoever is maintaining your DNS, it’s usually the IT person. Tell them “We need to add this TXT record to our DNS so that we can monitor our deliverability at Gmail.”
Do it Yourself
Learning how to set up Google Postmaster tools is super easy, but how you add that TXT record depends on your DNS provider (e.g. GoDaddy, Cloudflare).
Most providers have their own ways of doing things, but here is the general process:
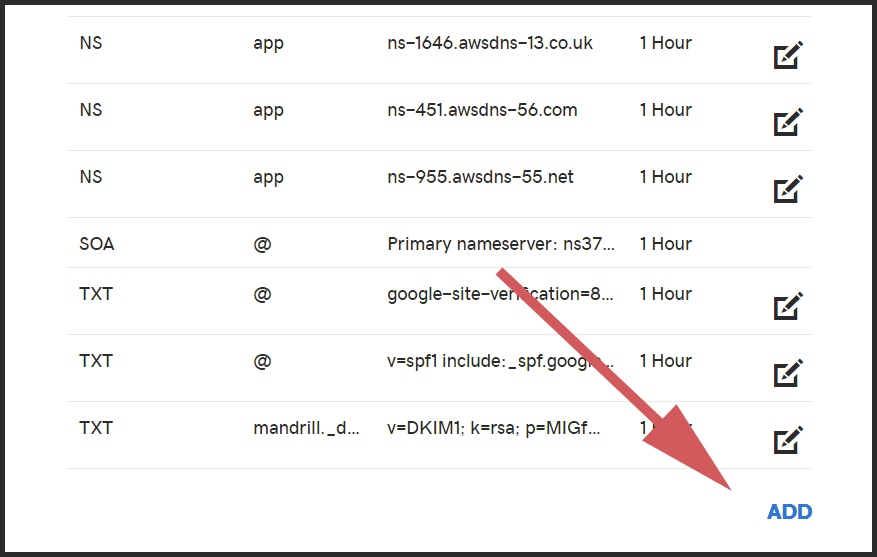
- Log into your DNS provider and find the domain in question.
- Under the DNS settings, you should find a place where you can add a TXT record. *
* Sometimes the button is labeled “add record” or “add” but you might be looking for “edit zone” or similar.
Do it Yourself (GoDaddy Example)
- Go to your domain name details
- Then “Manage DNS”
- Click “Add”
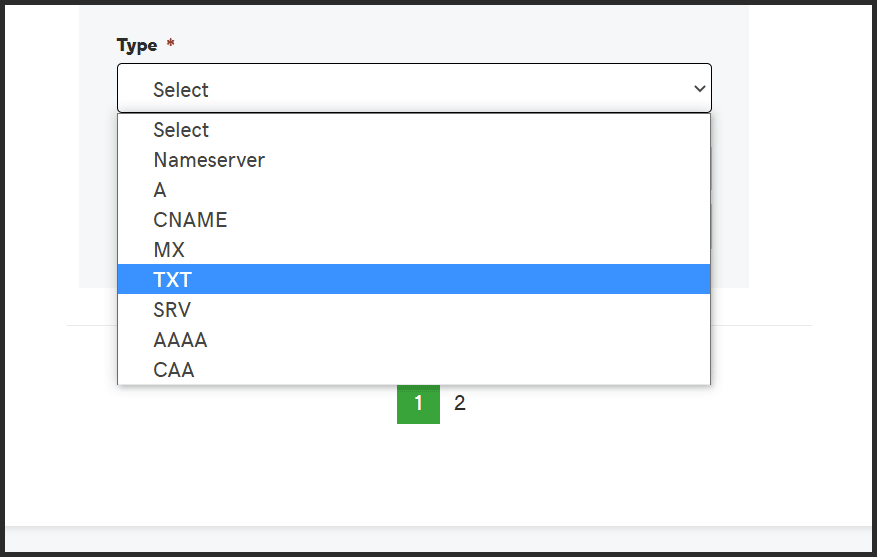
4. Select TXT from the dropdown
5. Enter “@” in the Host field (you may be able to leave this black at DNS providers)
6. Paste the text string provided by Google into the Value field
7. Leave the TTL field at its default setting.
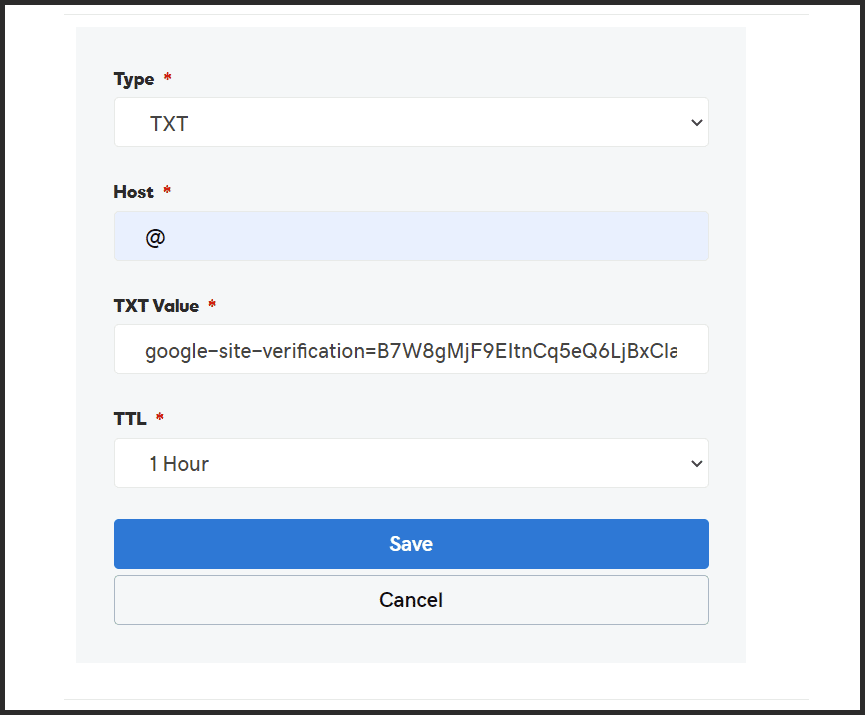
8. Save (the button may be labeled “Create” at your DNS provider)
6. Go back to Postmaster Tools, click Verify
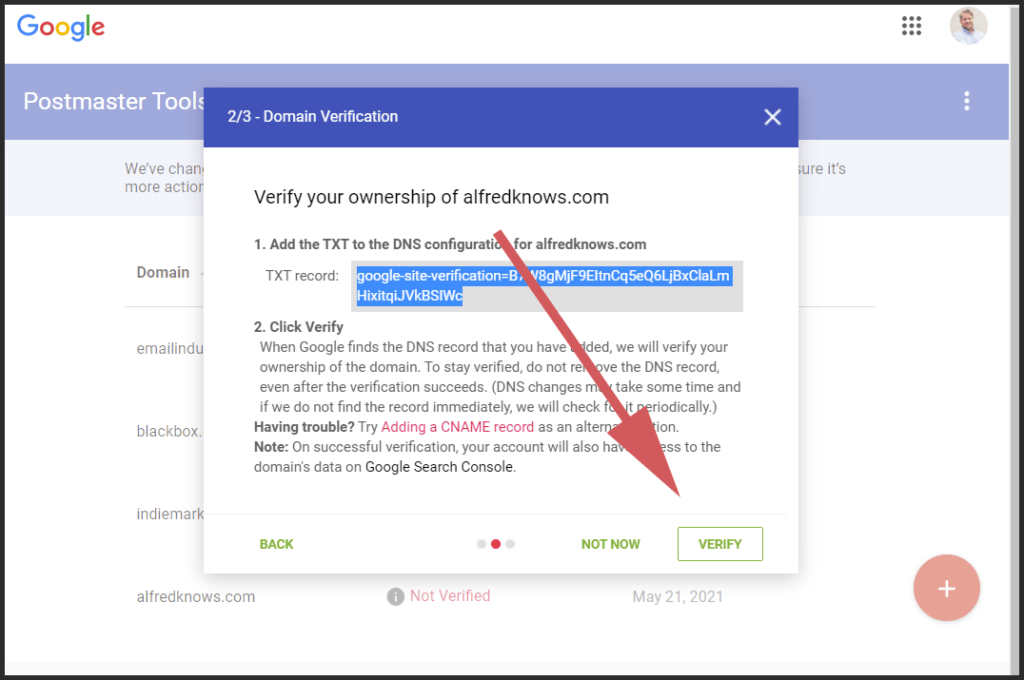
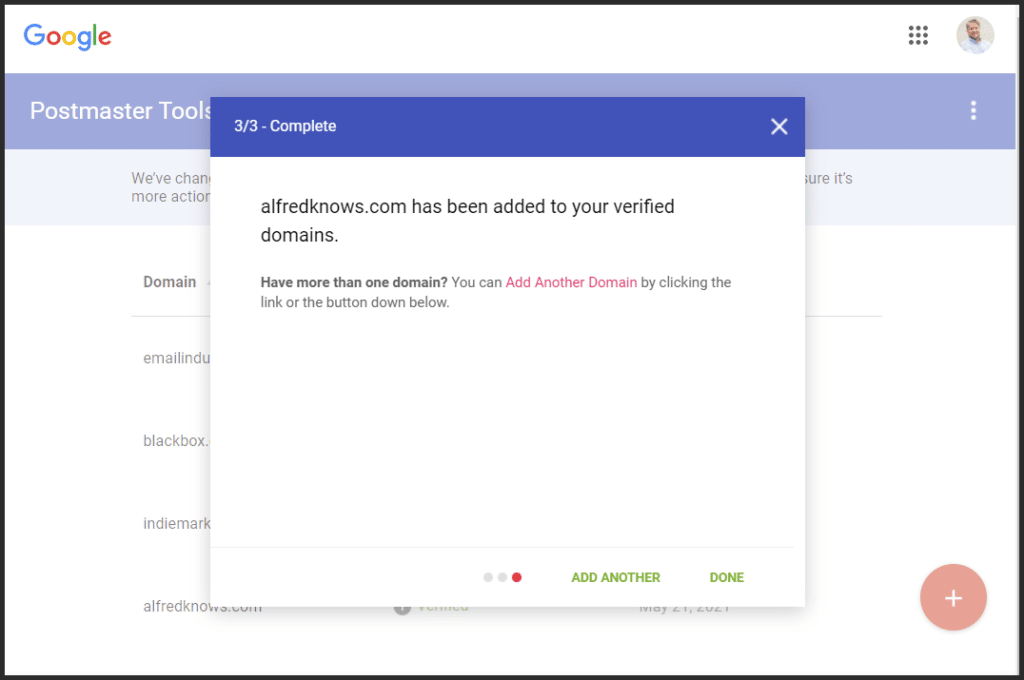
7. Bam! You’re all set.
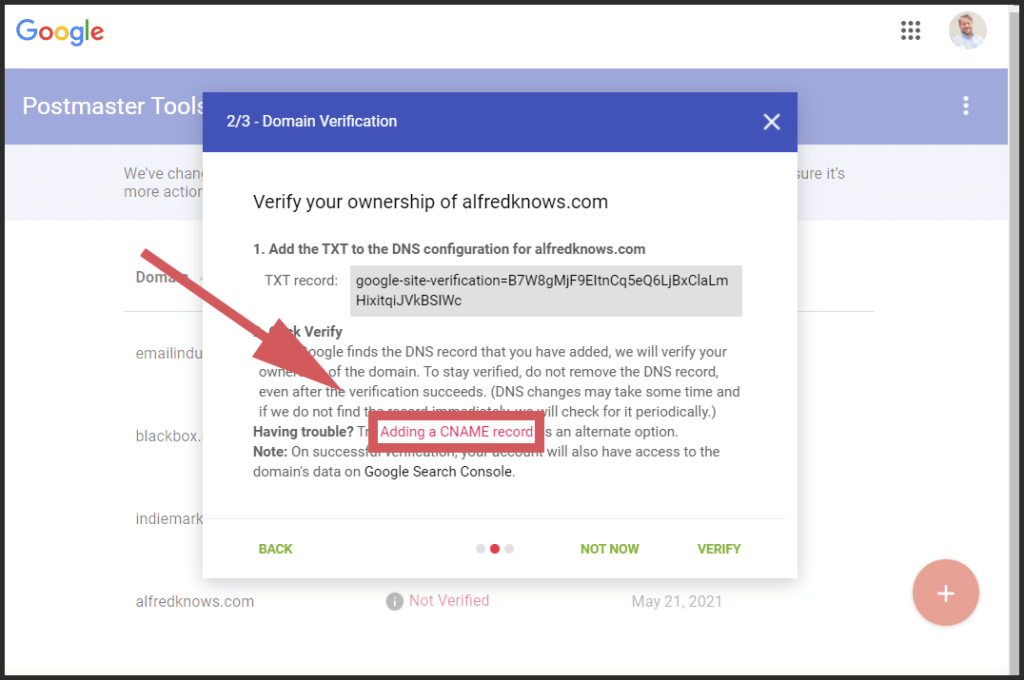
Couldn’t verify domains in Google Postmaster Tools?
If your domain setup uses CNAME records, as opposed to TXT records; follow these steps next.
Click on the ‘Adding a CNAME record’ link.
You will then be provided with the CNAME label/host and CNAME destination/target.
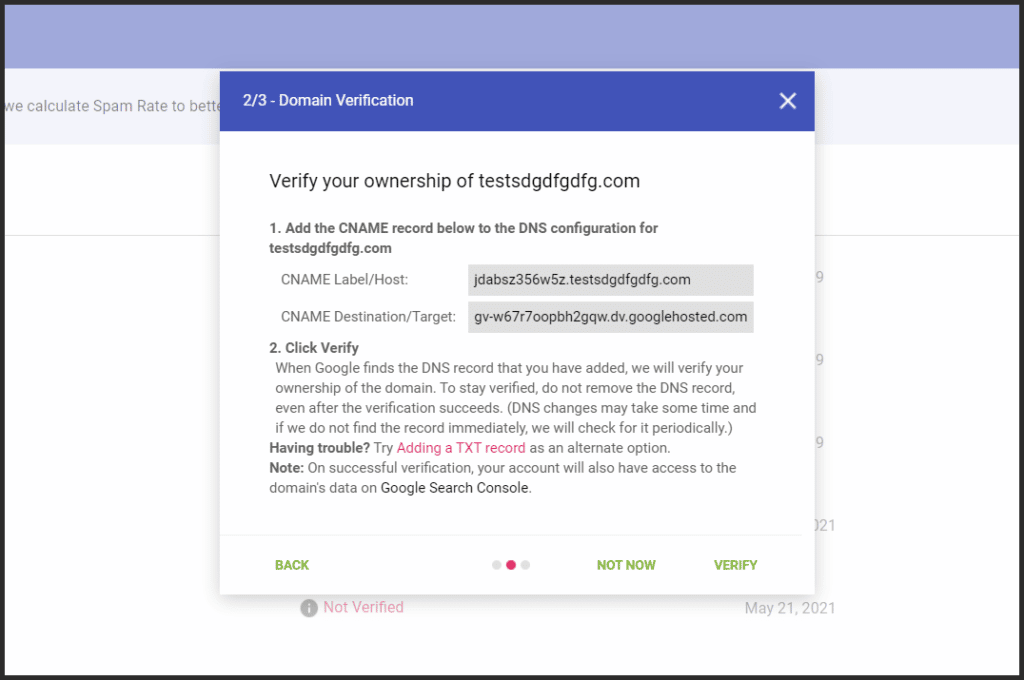
Copy the text in both fields and save them and send it to your IT team or do it yourself.
NOTE: If you’re going the DIY route, remember to add a CNAME record, not a TXT record to your DNS.
Once the records have been added to your DNS, return to the Postmaster page to verify ownership.
You’ve set up Google Postmaster Tools, now what?
If it’s a new domain, Google Postmaster tools data may not appear until at least 1,000 emails have been sent using the new domain but once your data is being populated, here’s what data is available the following drop downs available.
- Spam Rate
- IP Reputation
- Domain Reputation
- Feedback Loop
- Authentication
- Encryption
- Delivery Errors
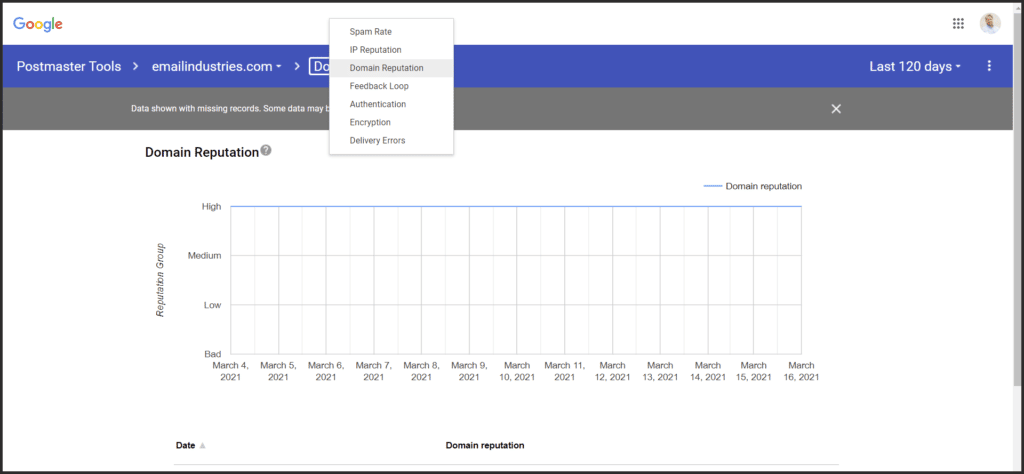
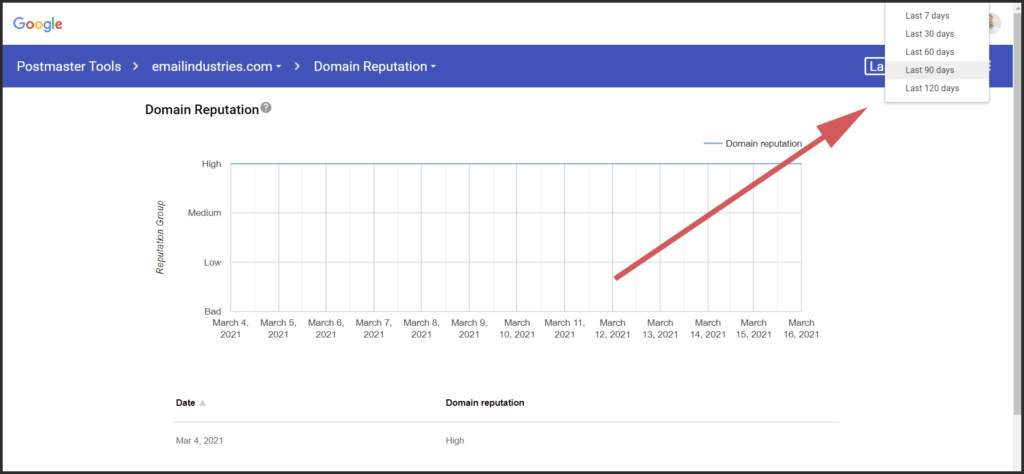
The option on the far right defaults to 7 days but you can change it to a longer time period if you’re not seeing any data.
Below are details about what each metric means:
Spam Rate
Google Postmaster Tools helps you determine your email spam rate. Your spam rate refers to the number of emails that end up in the spam folder compared to all the emails you send. Since a high spam rate can lead to low email deliverability, it is a crucial metric you must know and control to your advantage. Examine your spam rate on Google Postmaster Tools at intervals and adjust your campaign accordingly.
IP Reputation
Each sender has a unique IP address required for sending and receiving information online. As a business owner, you must determine your IP reputation and work on improving it if necessary. Google Postmaster Tools shows you how email servers view your IP address. If you have a history of sending low-quality or spam emails, your IP reputation will be bad, and your deliverability will suffer. Monitor your IP reputation with Google Postmaster Tools and take swift action to fix it when necessary.
Domain Reputation
Another important metric you can track on Google Postmaster Tools is your domain reputation. Using a credible domain for all business campaigns is essential to boosting conversions. When your domain reputation is bad, you will lose the trust of internet service providers (ISP). It also means your emails will be less likely to reach receiver inboxes. Google Postmaster Tools doesn’t just give you details about your domain reputation; it also offers actionable tips for fixing possible issues.
Feedback Loop
One of the best ways to know if your campaign is making any impact is to monitor the feedback loop. It is a metric that shows how your subscribers interact with your emails, and you can find it on Google Postmaster Tools. The feedback loop shows you who marked your emails as spam, who unsubscribed, and who opened to click through. You can use this insight to improve content and enhance the quality of your email subscription list.
Authentication
It is your responsibility as a sender to ensure email credibility. Without proper authentication, email servers are more likely to reject your emails or mark them as spam. It also makes it easier for malicious actors to impersonate your company and reach out to your subscribers with misleading or damaging information. Google Postmaster Tools allows you to monitor your authentication tools in real-time. You will find data on tools like DKIM (DomainKeys Identified Mail) and SPF (Sender Policy Framework).
Encryption
Malicious actors can manipulate your email in transit if it is improperly encrypted. Google Postmaster Tools provides you with data about your encryption protocols. It gives you specific details about how your protocols are encrypted and lets you know when there is a potential security breach. You will be better positioned to protect sensitive information about your clients so it doesn’t fall into the hands of unauthorized third parties.
Delivery Errors
It’s an unfortunate fact that not all your emails will be sent successfully. One of the best ways to improve your deliverability rate is to monitor delivery errors on Google Postmaster Tools. It shows you how many emails received delivery errors, why the delivery failed, and how you can improve your strategy to prevent similar things from happening again.
Next: How to add a new user to Google Postmaster Tools
We create a separate step-by-step guide: How to Add a User to Your Google Postmaster Tools Account
Need expert help with your deliverability?
For more than two decades, our deliverability experts have been helping senders and vendors hit the inbox—and increase market share. Contact us